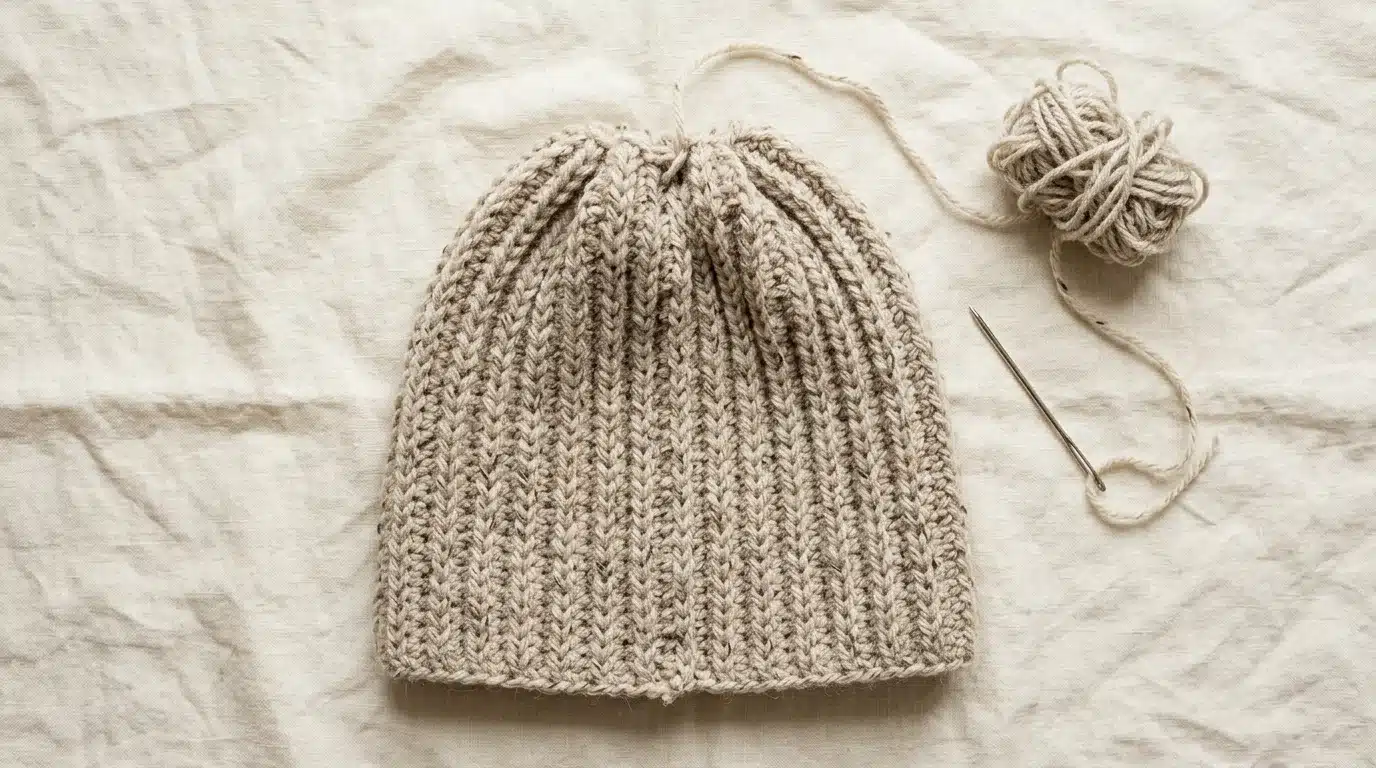
A crochet beanie can be as simple as a rectangle, a few rows of ribbing, and a seam at the back. You don’t need to learn circular crochet or crown increases before making your first wearable hat. This construction method is a good starting point if you’re comfortable with basic stitches and want to practise shaping through measurements rather than complicated stitch counts.
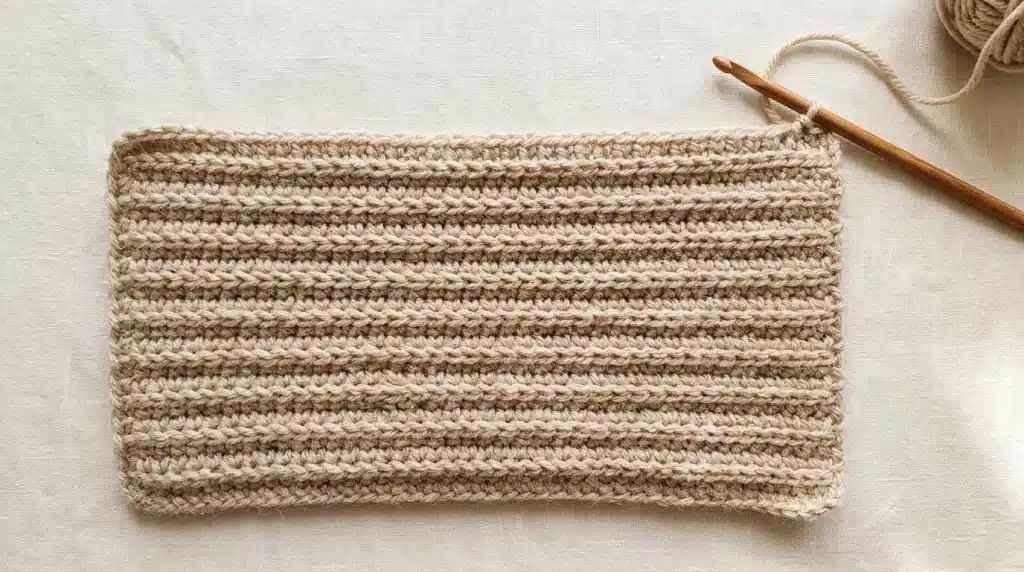
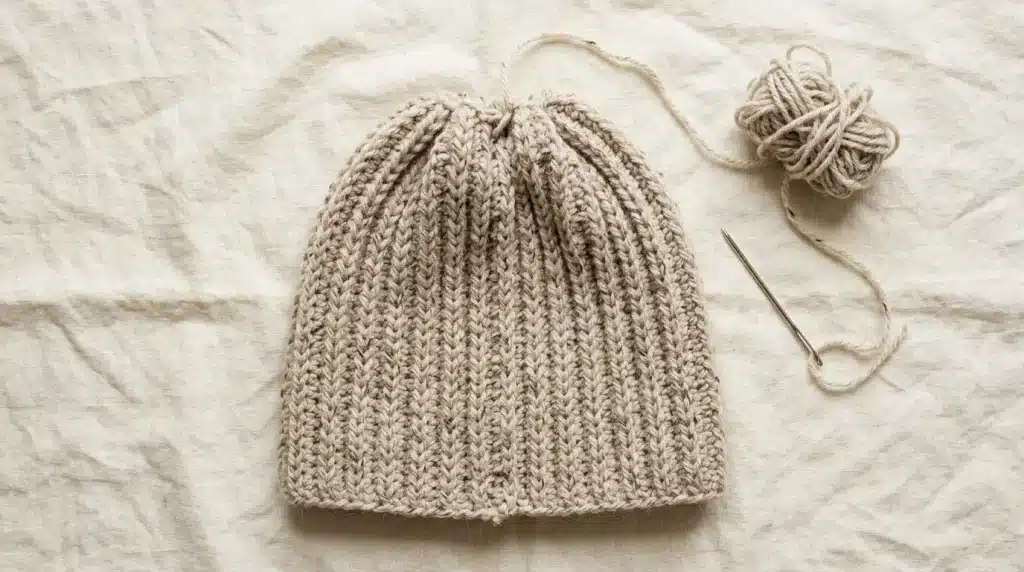
This free beanie crochet pattern uses rows of single crochet worked through the back loop only to create a ribbed fabric. The rectangle is folded and seamed, then gathered along the top to form the crown. You can adjust the measurements to achieve a closer fit, a taller cuff, or a more relaxed, slouchy shape.
If you prefer a hat worked from the crown down, Maple Hook Crochet also has a guide to free crochet hat directions. The pattern below uses a different construction method, so choose the approach that best suits your current skills.
Table of Contents
What You’ll Need for This Free Beanie Crochet Pattern?
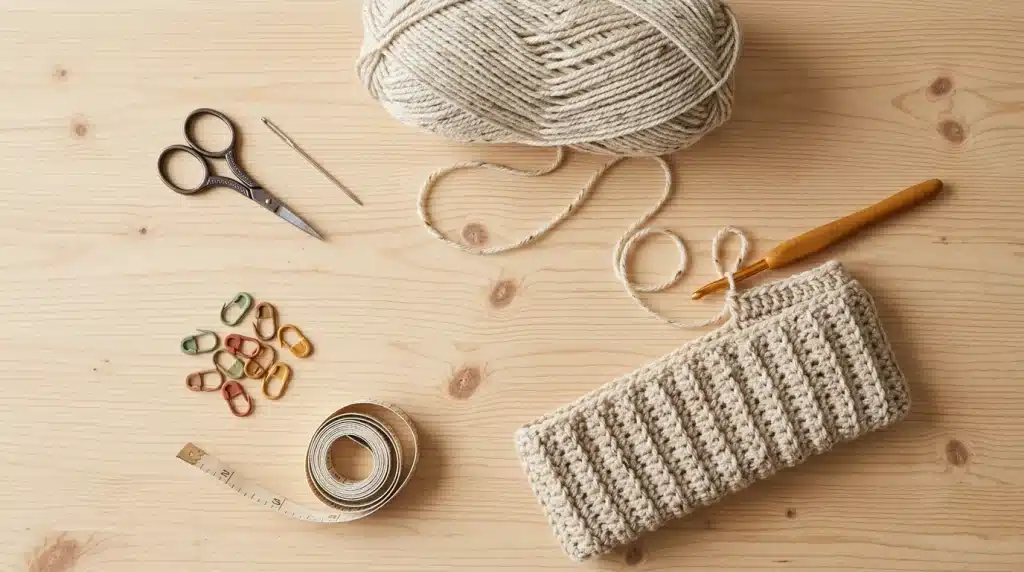
Gather your supplies before starting. The amount of yarn and the hook size will depend on your measurements, yarn choice, and crochet tension.
- Medium-weight yarn suitable for a hat
- Crochet hook recommended for your chosen yarn
- Scissors
- Yarn needle with a large eye
- Measuring tape
- Stitch markers, if helpful
Choosing Yarn for a Crochet Beanie
Smooth worsted-weight yarn is a practical starting point because the stitches are easy to see. Acrylic yarn is available in a wide range of colours, while wool and wool-blend yarns can provide warmth and elasticity.
Check the yarn label for the recommended hook size and care instructions. If you need help identifying yarn weights, consult the Craft Yarn Council’s yarn standards.
Avoid very fuzzy yarn for your first hat if you’re still learning to identify individual stitches. A smooth yarn makes it easier to see where your hook needs to enter.
Choosing the Right Crochet Hook
Start with the hook size recommended for your yarn. Because individual crochet tension varies, making a gauge swatch can help you decide whether to use a different size.
The finished fabric should be firm enough to hold its shape while retaining some stretch. A hook that’s too large may produce loose stitches and visible gaps, while a hook that’s too small can make the fabric stiff.
How to Make a Simple Free Beanie Crochet Pattern?
This rectangle-based design uses US crochet terminology. It is an original, general-purpose pattern draft rather than a personally tested sample. Check your measurements as you work and adjust the row count to suit your yarn and tension.
Pattern Information
- Construction: Flat rectangle, folded and seamed
- Main stitch: Single crochet through the back loop only
- Skill level: Beginner
- Fit: Adjustable
- Finished size: Determined by your head measurement and gauge
Abbreviations
- ch: Chain
- sc: Single crochet
- BLO: Back loop only
- sl st: Slip stitch
- st/sts: Stitch/stitches
Step 1: Measure the Head
Measure around the head where the lower edge of the beanie will sit. Keep the measuring tape comfortably snug without pulling it tightly.
For a stretchable hat, the rectangle’s length is often slightly shorter than the full head circumference. The amount of negative ease depends on the yarn and fabric, so avoid applying the same adjustment to every material.
Write down your measurements before beginning. These measurements will guide the size of your rectangle and help you achieve a comfortable fit.
Step 2: Make a Gauge Swatch
Chain enough stitches to make a small sample, then work several rows of single crochet through the back loop only.
Allow the sample to rest before measuring it. Count how many stitches fit into a measured section and how many rows fit into a measured height.
Your gauge provides a practical way to estimate the starting chain and the number of rows needed for your hat. Because the finished dimensions depend on your individual tension, use your swatch rather than relying entirely on a standard stitch count.
Step 3: Make the Foundation Chain
Chain until the starting chain measures the intended height of the beanie, including any cuff you plan to fold upwards.
For a traditional adult beanie, the height often falls somewhere around 8–10 inches before folding, although the ideal measurement depends on the wearer and desired style.
Add one turning chain if needed for your method. In the instructions below, this turning chain does not count as a stitch.
Step 4: Work the Ribbed Rows
Row 1: Single crochet in the second chain from the hook and in each remaining chain. Turn.
Row 2: Chain 1. Work one single crochet through the back loop only of every stitch across. Turn.
Repeat Row 2 until the rectangle measures the planned circumference, allowing for the stretch of your fabric.
Count the stitches in the first row and check them occasionally as you continue. The stitch count should remain consistent unless you intentionally make an adjustment.
Working through the back loop creates the raised ridges associated with crochet ribbing. Once the rectangle is turned and joined, the ridges run vertically from the lower edge towards the crown.
Step 5: Check the Fit Before Joining
Wrap the rectangle around the head or compare it with your planned circumference measurement.
The fabric should stretch enough to sit comfortably without creating excessive pressure. If the rectangle is too short, continue working rows. If it is too long, remove rows before proceeding.
Check the height as well. Remember that folding the lower edge into a cuff uses some of the fabric, reducing the visible height of the finished hat.
Step 6: Join the Rectangle
Fold the rectangle so that its two short edges meet.
Join these edges using slip stitches or a yarn needle and a suitable seaming method. Keep the seam even and avoid pulling it so tightly that the fabric loses its stretch.
You now have a tube. The ribbed ridges should run from the lower edge towards the crown.
Step 7: Gather the Crown
Thread a long yarn tail through a yarn needle. Pass the needle through the stitches around one open edge of the tube, spacing the passes evenly.
Pull the yarn gradually to gather the opening. Adjust the folds so the fabric closes evenly, then secure the gathered top with several small stitches.
Weave in the loose end on the inside of the hat. Check that the crown is securely closed before wearing the beanie.
Step 8: Finish the Brim
Fold the lower edge upwards if you want a cuffed beanie. Leave it unfolded for a taller, simpler silhouette.
Check the crown and seam, then try on the hat. If the lower edge feels too tight, review the circumference and stretch of your fabric before making another version.
Five Beanie Crochet Pattern Tips for a Better Fit
1. Check Your Gauge Before Starting
Two crocheters can use the same yarn and hook but produce different fabric sizes because their tension differs.
A gauge swatch helps you estimate how much fabric each stitch and row will produce. It can save time when making a fitted item and reduce the need to undo completed rows.
2. Keep the Rows Even
Back-loop-only crochet creates a ribbed texture, but inconsistent row tension can result in uneven ridges.
Try to maintain similar yarn tension throughout the project. Count the stitches at the end of a row if the rectangle starts to widen or narrow unexpectedly.
3. Choose the Right Amount of Stretch
The finished circumference has a major impact on comfort.
A stretchy ribbed fabric may fit differently from a dense single crochet fabric. Use the actual fabric and head measurement when deciding how much shorter the rectangle should be.
4. Secure the Crown Carefully
The gathered edge carries much of the tension at the top of the hat.
Pull the yarn in small stages rather than tightening it all at once. Distribute the folds around the opening and secure the yarn firmly so the crown does not loosen during wear.
5. Try the Hat Before Adding Decorations
A pom-pom, label, or decorative patch can be added after the basic fit is right.
Check the hat’s height and circumference first. It is easier to make fit adjustments before adding decorations than to remove them later.
Easy Free Beanie Crochet Pattern Variations
Once you’re comfortable with the rectangle construction, you can change the appearance without learning an entirely new method.
Ribbed Cuff Beanie
Work a taller rectangle and fold the lower edge upwards. The extra layer creates a thicker-looking cuff and gives the finished hat a classic beanie style.
Slouchy Crochet Beanie
Increase the height of the rectangle to create extra fabric at the back of your head. Check that the circumference still fits securely so the hat stays comfortable while wearing it.
Two-Color Beanie
Change yarn colours after a chosen number of rows. Secure the unused yarn or weave in the ends carefully so they do not show through the ribbing.
Textured Beanie
Try a different stitch pattern once you’re comfortable with the basic construction. Remember that changing stitches can affect both the stretch and the finished dimensions, so make another gauge swatch if needed.
Pom-Pom Beanie
Attach a yarn pom-pom to the crown after finishing the seam. Secure it firmly, especially if the hat will be handled frequently.
Common Problems When Making a Crochet Beanie
Why Is My Beanie Too Tight?
The rectangle may be too short, or your stitches may be tighter than expected. Check the finished circumference and compare it with the head measurement. If necessary, adjust the hook size or work additional rows.
Why Does My Hat Look Uneven?
The rectangle may have inconsistent row tension, or the crown gathers may be distributed unevenly. Lay the hat flat and inspect the seam before making further adjustments.
Why Does the Crown Have a Large Opening?
The gathering yarn may not have passed through every stitch around the edge. Check the yarn path, then tighten the opening gradually and secure it with small stitches.
Can I Use a Different Yarn Weight?
Yes, but the starting chain, row count, hook size, and finished dimensions may change. Make a gauge swatch and work from your measurements rather than copying the same stitch counts blindly.
More Crochet Hat Patterns and Tutorials
If you’d like to compare construction methods, these resources offer useful alternatives:
- Maple Hook Crochet: Free Crochet Hat Directions — Explore a crown-down adult beanie guide with shaping and fit advice.
- Maple Hook Crochet: Crochet Pattern Cap — Learn about the construction of a structured baseball-style crochet cap, which differs from a soft beanie.
- Yarnspirations: Free Beginner Beanie Pattern — Explore a published beginner pattern with sizing guidance and a downloadable pattern.
- Lion Brand Yarn: Beginner’s Beanie — Find a published beginner-level hat pattern with its own materials and gauge information.
These are separate patterns, so follow each designer’s instructions for stitch counts, yarn requirements, and sizing rather than mixing them with this rectangle-based design.
FAQs
Is This Beanie Suitable for Beginners?
Yes, if you already know how to chain and make single crochet stitches. The main skills are working through the back loop, measuring a rectangle, seaming, and gathering the crown.
Can I Make This Beanie Without a Magic Ring?
Yes. This construction uses a foundation chain and does not require a magic ring.
How Do I Make the Beanie Fit a Child?
Measure the child’s head and adjust the rectangle’s length and height accordingly. Do not rely only on age, as head sizes and preferred fits vary.
Can I Make a Beanie Without Sewing?
This particular construction requires joining the rectangle and gathering the crown. If you want to avoid a seam, choose a pattern worked in the round, such as a crown-down style.
How Do I Wash a Finished Crochet Hat?
Follow the care instructions for the yarn you used. Some fibres can be machine-washed, while others require gentle hand-washing or flat drying. Check the yarn label before washing to help maintain the hat’s shape and texture.

Leave a Reply