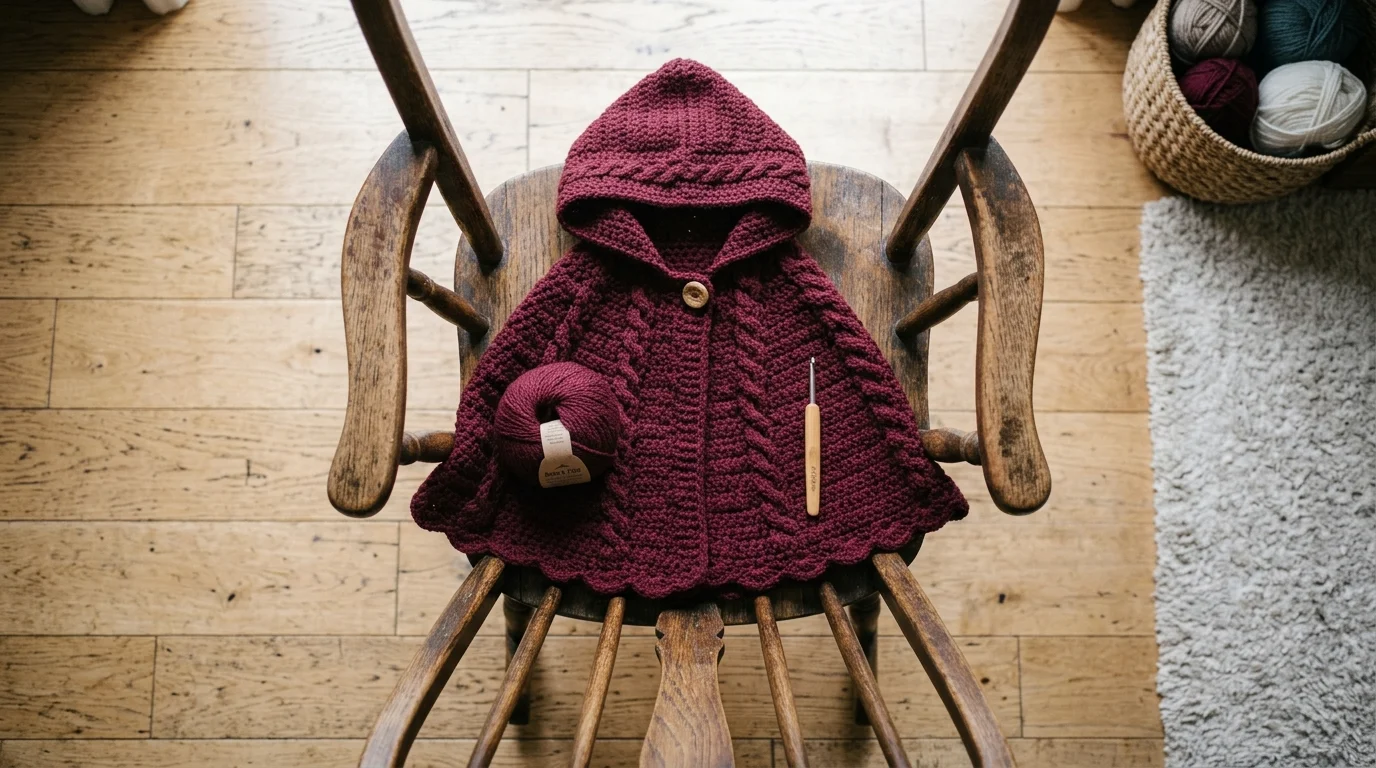
A crochet cape sits in an easy middle ground between a shawl and a full garment — more structured than a wrap, but without the sleeves or fitted shaping a sweater needs. That makes it a genuinely good project once you’re past total-beginner stitches but not ready for garment construction yet.
Wikipedia describes the cape as a sleeveless outer garment that drapes the back, shoulders, and arms and fastens at the neck, a shape that’s stayed close to the same basic geometry across centuries of clothing history. Crochet versions follow that same logic — a piece of fabric shaped to cover the shoulders, with an opening for the neck or a front closure.
Below are five ways to build one, all from standard, well-documented technique rather than a single designer’s copyrighted pattern. Feel free to resize any of them, change the yarn, or adjust the length.
Table of Contents
What makes a crochet cape different from a shawl or poncho?
The distinction matters for choosing the right construction. A shawl is typically draped and held closed by hand or a pin; a poncho is a closed loop with a fixed head opening; this shape usually falls between the two — open down the front like a shawl, but shaped with more structure through the shoulders, often closing with a button or tie at the neck.
Yarn and hook sizing for all five follow the Craft Yarn Council’s standard yarn weight system — worsted weight on a mid-size hook is the most forgiving starting point for a first attempt, since it produces fabric with enough structure to hold its shape at the shoulder without being too heavy to wear comfortably.
1. Basic Triangle Crochet Cape
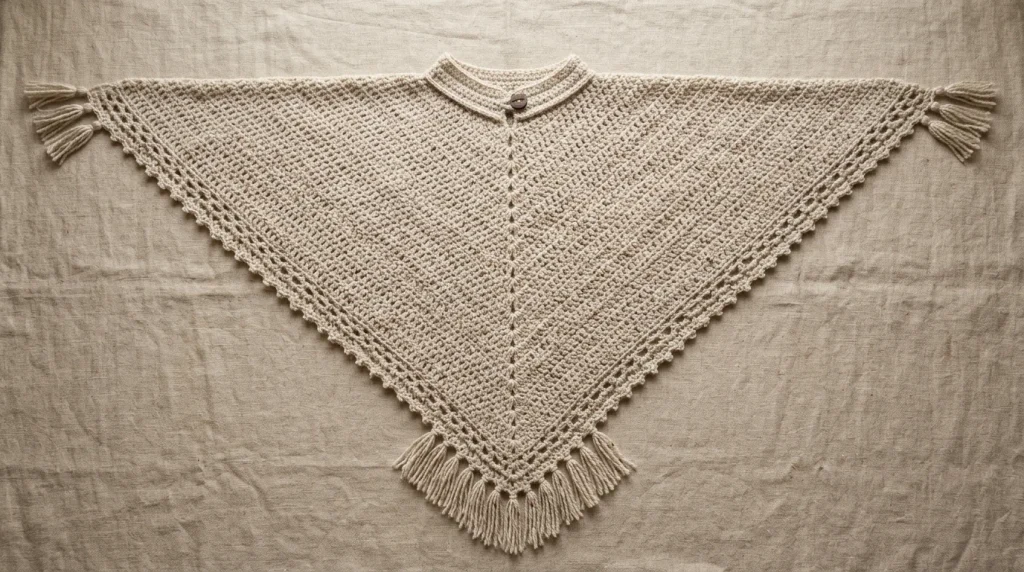
The simplest possible cape: a wide, shallow triangle worked from the neck down.
Skill level: Beginner
Yarn: Worsted weight (#4), roughly 700–900 yards
Hook: 5.5–6 mm (I–J)
Chain 4, join into a ring. Row 1: chain 3, work 2 dc into the ring, chain 2, work 3 more dc into the ring, turn. Every row after: chain 3, 2 dc in the same stitch, dc across to the chain-2 space, (2 dc, ch 2, 2 dc) into that space, dc across to the end, 2 dc into the top of the turning chain. The chain-2 space becomes the point of the triangle at the center back. Keep working rows until the cape reaches shoulder-to-wrist length rather than the deeper point a full shawl would use, then fasten off and add a button or tie at the neck edge if you want a closure.
2. Circular Crochet Cape
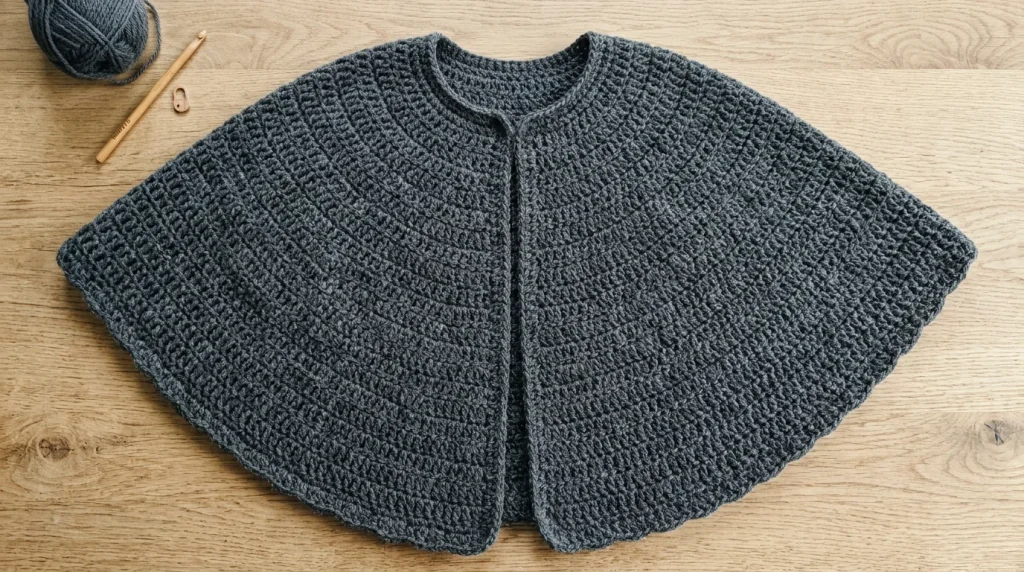
Worked in continuous rounds from the neck down, this version has no seams at all.
Skill level: Beginner-intermediate
Yarn: Worsted weight (#4), around 800–1,000 yards
Hook: 6 mm (J)
Start with a foundation chain joined into a ring at the neck, then work double crochet in rounds, increasing evenly around — typically 2 dc into the same stitch at 8 evenly spaced points per round. Continue until the circle reaches past the shoulders and down to roughly elbow length, then fasten off. Split the front open in a straight line from the neck to the hem (either by working flat from that point on, or by cutting and finishing the edge with a single crochet border) to turn the closed circle into an open-front piece.
3. Granny Stripe Crochet Cape
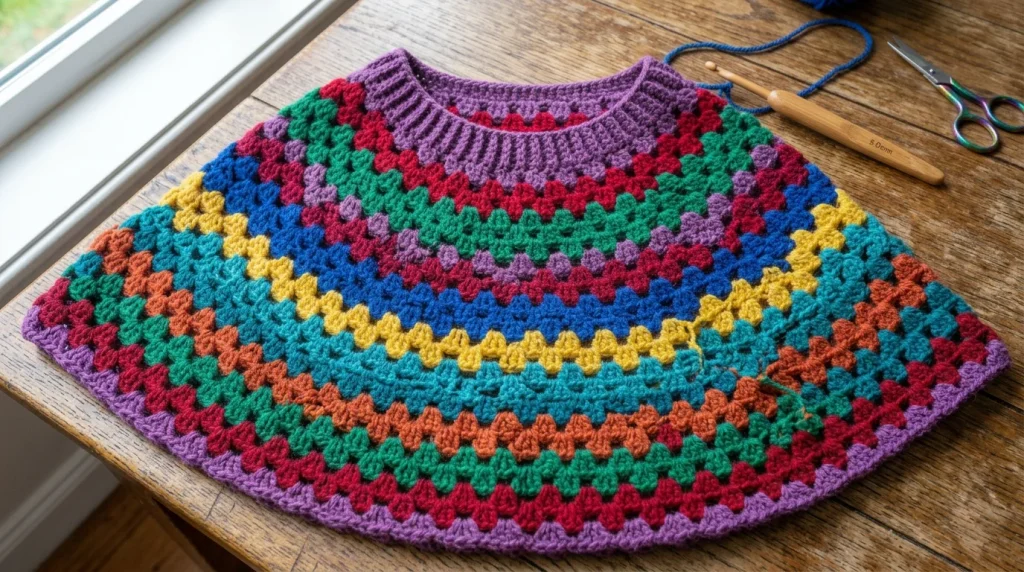
Same triangle shape as the first pattern, but built from granny clusters instead of individual double crochets.
Skill level: Beginner, comfortable with basic stitches
Yarn: DK or light worsted (#3), around 850 yards if using two or three colors
Hook: 4.5–5.5 mm (7–I)
Set up the same way as the basic triangle — chain 4, join, and establish a chain-2 space at center back — but work groups of 3 dc separated by chain-1 spaces instead of single stitches, increasing at the center point and both outer edges by adding an extra (3dc, ch1) group each row. Switching colors every row or two hides the transitions cleanly at the edge of each row, which makes this a practical option for using up leftover skeins.
4. V-Stitch Lacy Crochet Cape
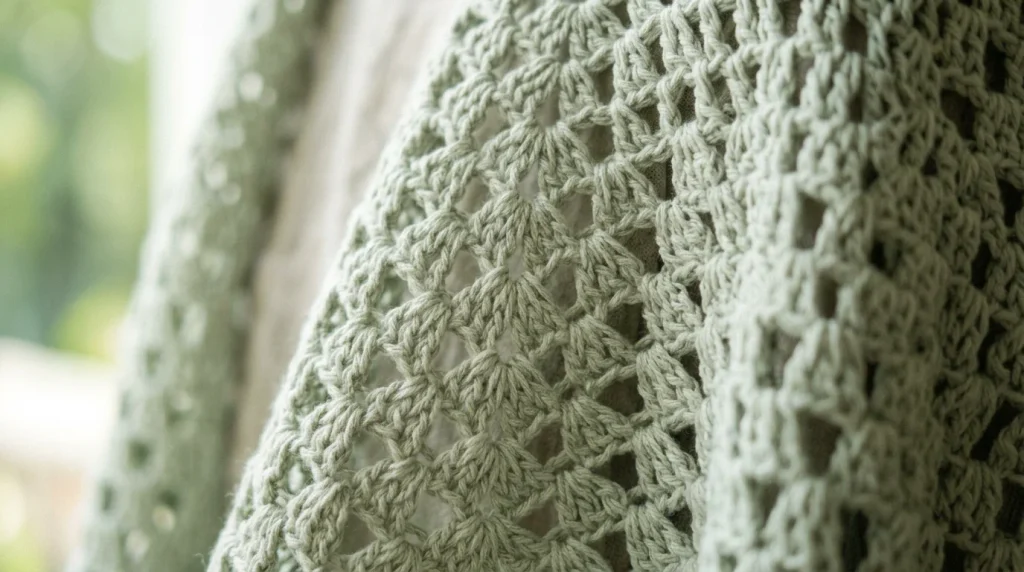
For a lighter cape that drapes rather than insulates, V-stitch fabric gives you open, airy coverage.
Skill level: Beginner, comfortable with basic stitches
Yarn: DK or sport weight (#2–3), around 900–1,000 yards
Hook: 4.5–5 mm (7–H)
A V-stitch is (dc, ch 1, dc) worked into a single stitch, skipping a stitch between each repeat. Build a wide triangle the same way as pattern one, but substitute V-stitch groups for the plain double crochet rows, increasing at the center point each row. The open structure uses noticeably less yarn than a solid triangle of the same size and suits a piece meant for transitional weather rather than winter warmth.
5. Corner-to-Corner (C2C) Crochet Cape
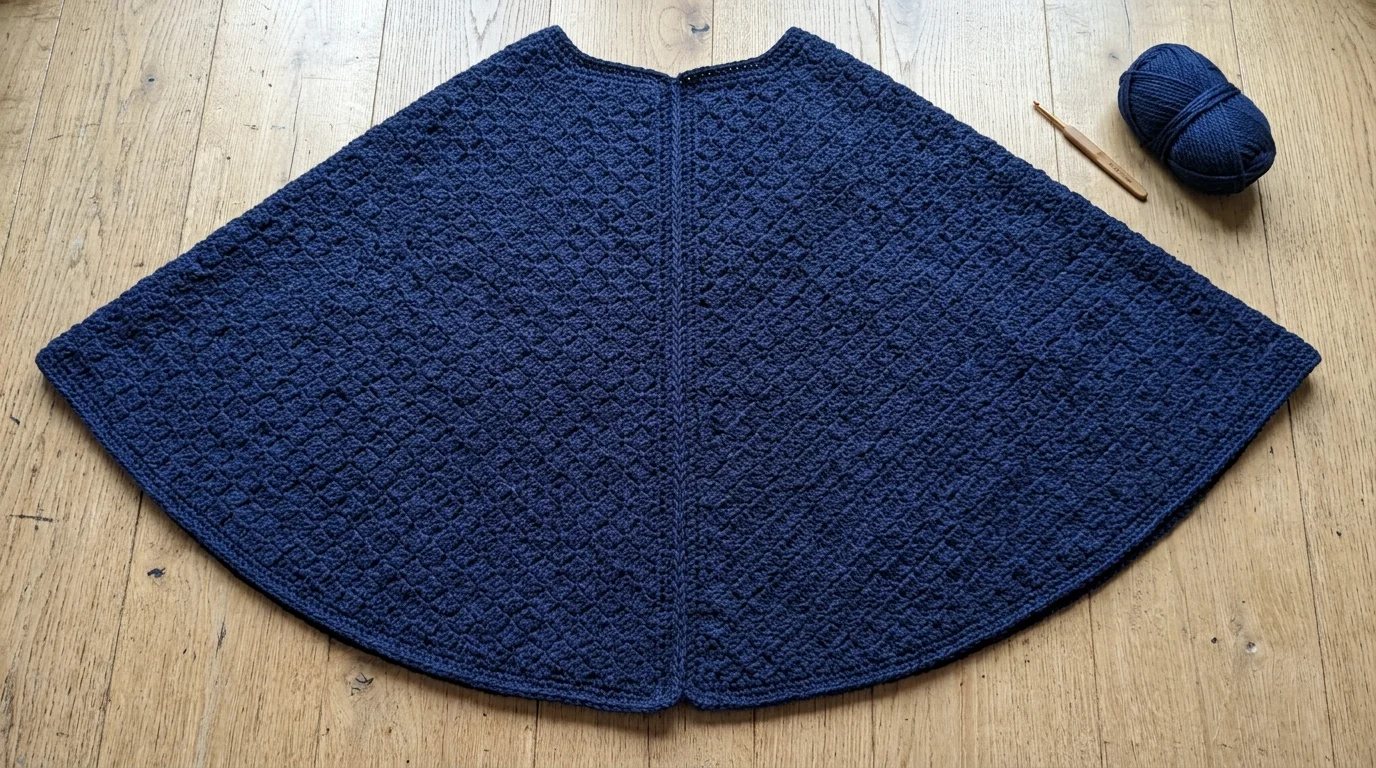
Two joined C2C triangles give this version a distinct blocky texture instead of smooth rows.
Skill level: Beginner-intermediate
Yarn: Worsted weight (#4), around 900 yards
Hook: 5.5 mm (I)
Work two identical C2C triangles — blocks of 3 dc built into chain-3 spaces, increasing by one block at the start of every row — until each triangle reaches half the total cape width you want. Join the two triangles along one edge at the center back, leaving the front open, and the diagonal block texture gives the finished piece more visual interest than a plain-stitch version while using the same basic increase logic as the triangle patterns above.
Choosing between these five
The basic triangle and the circular version are the most forgiving starting points if you’ve never made a crochet cape before — both rely on one repeated action rather than tracking two stitch patterns at once. The granny stripe version is the better choice if you’d rather work with smaller, more portable repeats, since the grouped stitches go faster once memorized. Save the V-stitch and C2C versions for once basic increases feel automatic — the V-stitch requires slightly more attention to stitch placement, and C2C takes a few rows to settle into rhythm before the increase pattern clicks.
Getting the fit right
Length is the main variable to get right with any crochet cape — too short and it reads more like a collar than a garment, too long and it starts behaving like a poncho instead. Measuring from the base of the neck to where you want the hem to fall, then checking your in-progress piece against that measurement every few rows, is more reliable than following a fixed row count, since gauge varies enough between crocheters that identical instructions rarely produce identical results.
Blocking makes a real difference for how a finished crochet cape drapes, particularly the V-stitch and granny stripe versions — wetting the piece and pinning it to the intended shape while it dries opens up the stitch pattern and settles the shoulders into a cleaner line than air-drying alone produces.
Choosing the right yarn and color
Solid-color yarn shows off the stitch structure most clearly, which matters more for the granny stripe and C2C versions than for the plain triangle or circular builds, since their visual interest comes from the texture and block pattern rather than color changes. If you’d rather use variegated or self-striping yarn, the basic triangle and V-stitch versions handle it better — their simpler, more uniform stitch pattern lets the color do the work without competing with a busy stitch texture underneath.
Weight matters for drape as much as warmth. A worsted-weight cape holds its shape at the shoulder and works well as an outer layer on its own; a lighter DK or sport-weight version drapes more like a scarf and layers better under a coat than replacing one. If you’re not sure which you want, working a swatch in both weights before committing to a full project is a quick way to compare how each one actually hangs, rather than guessing from the yarn label alone.
Common mistakes to avoid
A few issues come up more often with a cape than with a plain shawl, mostly because of the shoulder shaping. Increasing too quickly at the center point produces a triangle that flares out wide before it’s reached a usable length, which reads as an odd, overly pointed shape rather than a smooth shoulder line — spacing increases evenly, one set every row rather than doubling up, keeps the growth proportional. On the circular version, uneven increase spacing around the round causes the piece to ripple or cup instead of lying flat, the same issue that shows up in any circular motif worked without evenly distributed increase points.
Tension consistency matters more here than in a scarf or blanket, since a cape needs to hang correctly across the shoulders rather than just lie flat on a table. Working a full gauge swatch before starting, rather than relying on the first few rows of the actual project to judge tension, catches inconsistent stitching before it affects the finished shoulder line.
More Patterns to Try Next
FAQs
Can I add sleeves to a crochet cape pattern?
Not without changing the construction significantly — the sleeveless, draped shape is what defines a cape rather than a cardigan or sweater. If you want arm coverage, a poncho or a simple raglan cardigan construction is a better starting point than adapting one of these.
What’s the best yarn weight for a first crochet cape?
Worsted weight is the most forgiving choice, since it holds shape at the shoulder without being too heavy to drape comfortably. The Craft Yarn Council’s chart is the reference to check if you’re substituting a different weight.
How much yarn does a crochet cape actually need?
The ranges above are reasonable starting points, but actual yardage depends on your gauge and finished size. Weighing a swatch before committing to a full skein purchase gives a more reliable estimate than the general ranges alone.
Does a crochet cape need a closure at the neck?
Not strictly — several of these patterns work fine worn open, draped over the shoulders like a shawl. A button, tie, or shawl pin at the neck is optional, mainly useful if you want it to stay in place during movement rather than needing to be held closed by hand.

Leave a Reply