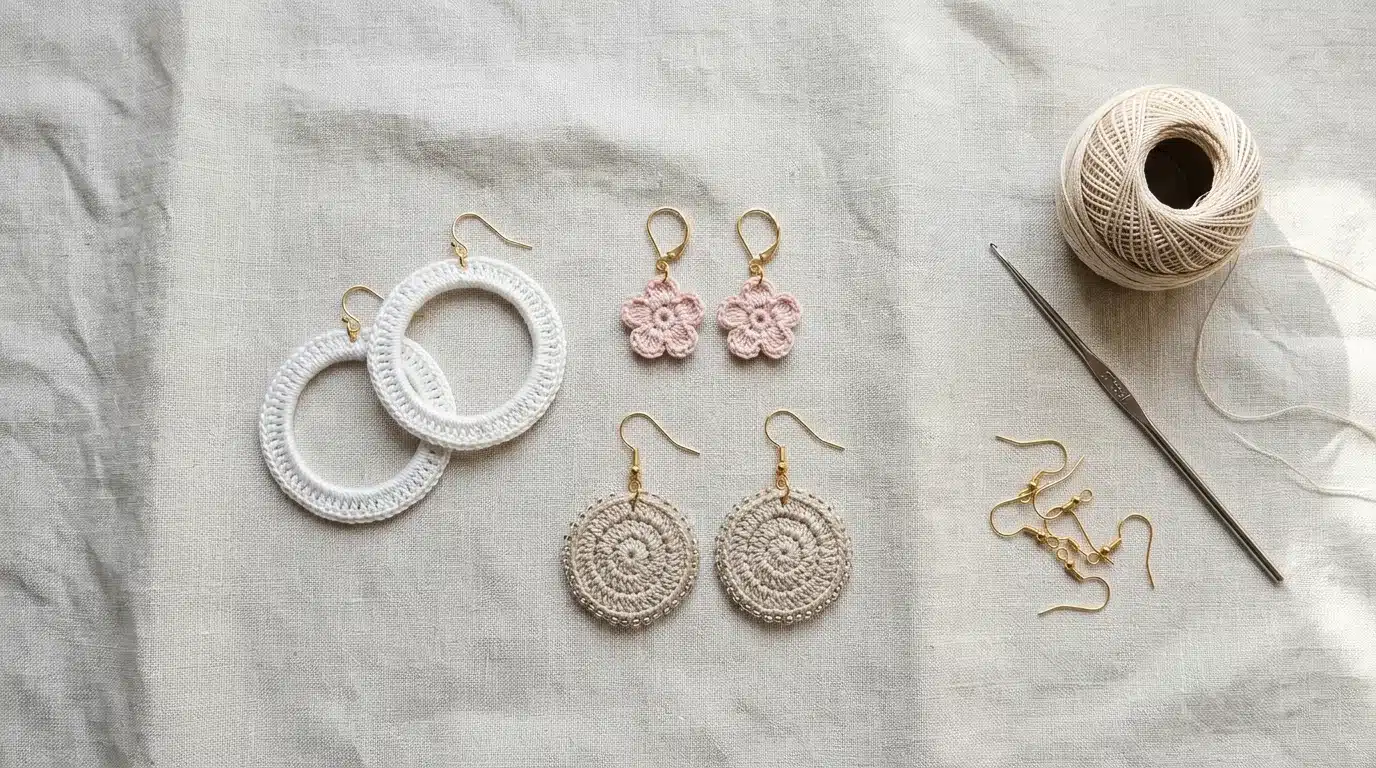
Crochet earrings use a few yards of thread, a small hook, and an hour or less per pair. That small footprint is why they work for practising new stitches, using up leftover thread, and making gifts that fit in an envelope. This guide gives you three crocheted earring patterns (a covered hoop, a five-petal flower, and a beaded dangle), plus the thread, hook, stiffening, and finishing choices that decide whether a pair looks neat or limp.
Everything here is written in US terms. If you crochet in UK terms, the conversion chart further down will save you a wrong turn.
Table of Contents
What You Need for Crochet Earrings?
The materials list is short, but each item changes the result more than you’d expect on a piece this small.
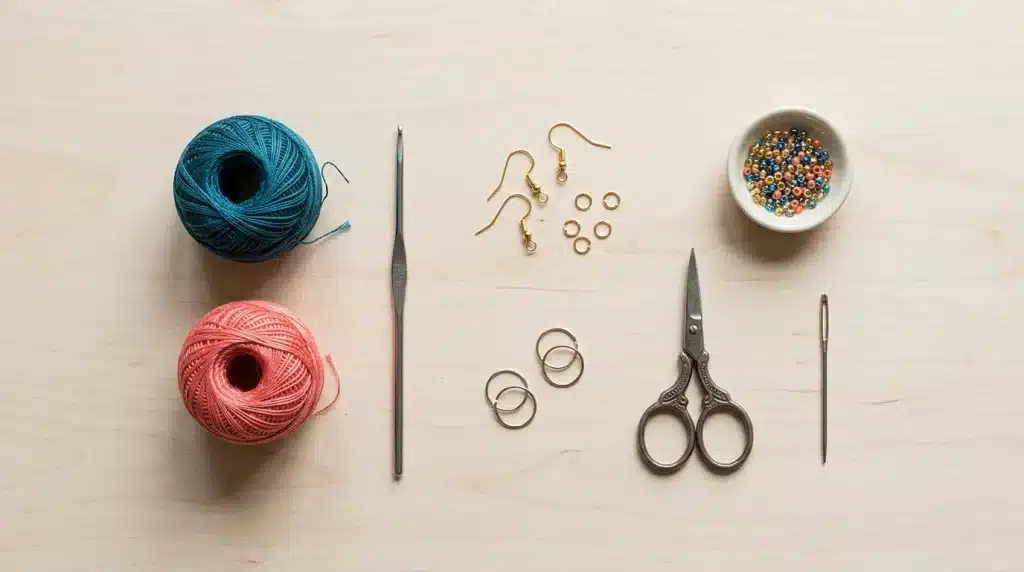
- Thread or yarn: Mercerized cotton crochet thread keeps its shape and takes stiffener well. Size 10 is common for earrings. The Craft Yarn Council places 10-count crochet thread in its lace category (weight 0), and Yarnspirations lists Aunt Lydia’s Classic Crcochet Thread Size 10 as a size 0 lace-weight product. Embroidery floss and fine cotton yarn also work if you want a chunkier, softer look.
- Hook: For lace-weight thread, the Craft Yarn Council’s standard yarn weight chart lists steel hooks in the 1.4 to 1.6 mm range, or a regular 2.25 mm hook. Always go by your pattern’s gauge note, since the council states these sizes are guidelines only.
- Earring findings: Hooks, posts, or leverbacks, plus jump rings if your design dangles.
- Rings for hoops: Metal or wooden rings in whatever diameter you like. Bigger rings need more thread to cover.
- Seed beads (optional): Check that the bead hole fits your thread before you buy a whole tube.
- Stiffener: Fabric stiffener, or white craft glue thinned with water.
- Small scissors and a blunt yarn needle for weaving in tails.
Choosing Thread and Hook Size
Thread thickness controls the finished size of the earring. A flower worked in size 10 thread comes out small and delicate. The same stitch counts in fingering-weight cotton yarn produce a visibly larger flower, and in worsted weight you get something closer to a coaster. So when a pattern doesn’t give a finished size, treat your own thread and hook as part of the pattern and make a test piece first.
Hook size works the same way in reverse. A hook that’s too large for the thread leaves gaps, and earring motifs with gaps flop. Going a little smaller than the label suggests gives a denser fabric that holds its shape after stiffening. This is the same logic behind the tighter tension recommended for amigurumi, and the soft toy crochet guide on this site covers it if you want the longer explanation.
Crochet Earring Pattern 1: Thread-Covered Hoop Earrings
Crochet hoop earrings are the fastest of the three because there are no rounds to count. You work single crochet stitches directly around a ring, and the ring does the shaping for you. If you’ve never made a single crochet, the single crochet stitch tutorial covers it step by step.
Materials: Size 10 cotton thread, matching hook, one ring per earring, earring hook or wire.
- Make a slip knot and place it on your hook.
- Hold the ring in your left hand. Insert the hook through the center of the ring, yarn over, and pull up a loop (two loops on hook), then yarn over and pull through both loops. That’s your first single crochet around the ring.
- Keep working single crochet around the ring, pushing each new stitch close to the last one so the ring disappears. Leave the thread tail lying along the ring so you crochet over it.
- Work until the ring is covered. The stitches will look slightly crowded, and that’s correct. Loose stitches slide around the ring.
- Slip stitch to the first stitch, cut the thread, and pull through.
- Weave the tail through a few stitches along the inside of the ring, then trim.
- Attach an earring hook to the ring with a jump ring, or leave the ring open at one point and slide the ear wire through.
Variation: Change color halfway around for a half-and-half hoop, or leave a small section uncovered so the metal shows.
Crochet Earring Pattern 2: Five-Petal Flower Earrings
Crochet flower earrings start from a magic ring, which closes tighter than a chain-and-join start. Practise it on scrap thread before you commit to a good color, since a slipping ring is hard to rescue in thread this fine.
Abbreviations (US): ch = chain, sc = single crochet, dc = double crochet, sl st = slip stitch.
Round 1: Make a magic ring. Ch 1, work 10 sc into the ring. Pull the tail to close the ring tightly. Join with a sl st to the first sc. (10 sc)
Round 2 (petals): In the next stitch work (sl st, ch 2, 2 dc, ch 2, sl st). Sl st in the next stitch. Repeat from * to * four more times. You now have five petals, each sitting in one stitch with a slip stitch between them. Join to the first sl st, fasten off, and leave a long tail for attaching findings.
Finishing: Weave in the starting tail first, then use the finishing tail to sew a small loop at the back of one petal. Attach a jump ring through that loop and add an ear wire. Stiffen as described below.
Making it bigger: Add a round of sc between Round 1 and the petals, working 2 sc in each stitch to double the count, then adjust the petal repeat to match. Any change to the stitch count changes where the petals fall, so work out the repeat on paper before you start.
Crochet Earring Pattern 3: Beaded Dangle Earrings
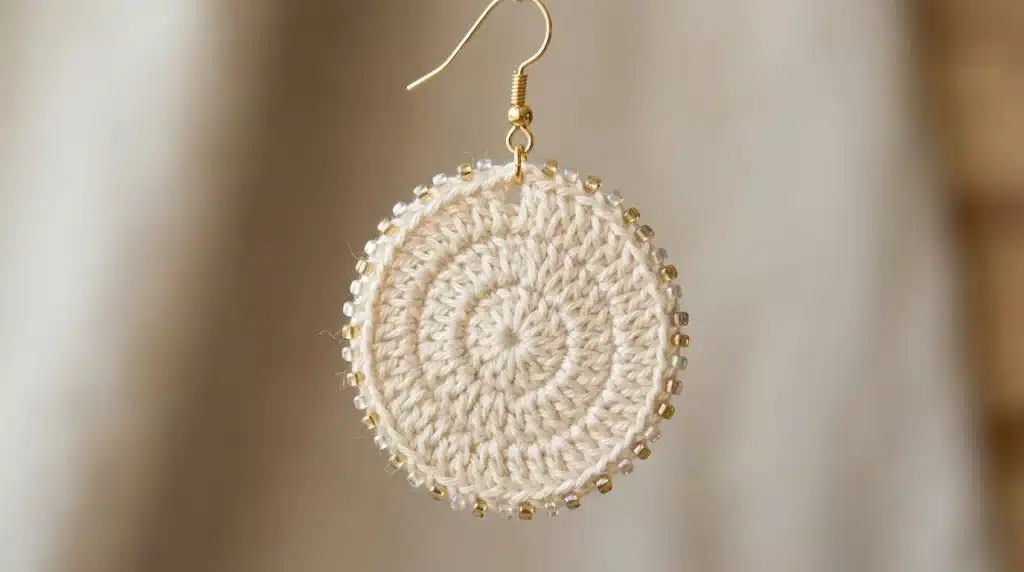
Crochet earrings with beads need one decision up front: thread the beads onto the working thread before you start crocheting. You can’t add them mid-piece without cutting the thread. Load about as many beads as you plan to use, plus a couple of spares.
Round 1: Make a magic ring. Ch 1, work 8 sc into the ring, join with a sl st to the first sc. (8 sc)
Round 2: Ch 1, work 2 sc in each stitch around. (16 sc) Join.
Round 3 (bead round): Ch 1. Slide a bead up against the hook, sc in the next stitch so the bead sits on the front of the work. Sc in the next stitch. Repeat around, and join. The beads land on every other stitch. Skip the bead on any stitch where you want a plain look.
Fasten off, weave in ends, and attach a jump ring through one stitch on the edge. Hang the circle from an ear wire, or sew a short chain of beads to the bottom of a stud for a two-part dangle.
If your beads keep landing on the back of the work, you’re sliding them up too early. Bring the bead up after you’ve inserted the hook into the stitch and drawn up a loop, then complete the stitch.
Stiffening Crochet Earrings So They Hold Their Shape
Unstiffened thread motifs are soft and will curl at the edges. Stiffener fixes that.
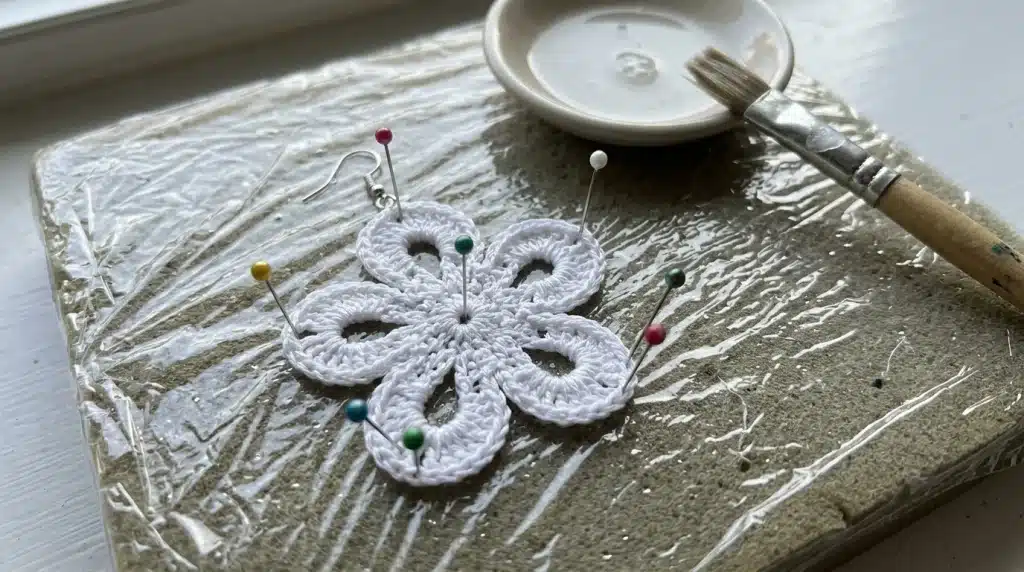
- Pin the finished motif flat to a foam board or a piece of cardboard covered in plastic wrap. Shape the petals or edges with your fingers.
- Brush on fabric stiffener, or a mix of white craft glue and water, until the thread looks saturated but not dripping.
- Let it dry completely, usually overnight. Don’t unpin early. A half-dry earring will lose its shape the moment you lift it.
- Peel it off the plastic wrap and trim any stray fibers.
Cotton thread takes stiffener better than acrylic or wool-blend yarn, which is another reason to choose mercerized cotton for earrings. Stiffened earrings aren’t waterproof, so tell anyone you gift them to to keep them dry.
US vs UK Terms
| US term | UK term |
|---|---|
| single crochet (sc) | double crochet (dc) |
| double crochet (dc) | treble crochet (tr) |
| slip stitch (sl st) | slip stitch (ss) |
| chain (ch) | chain (ch) |
The patterns above use US terms. If you see “sc” in a UK pattern, check which system it uses, since pattern writers sometimes switch conventions without saying so.
Common Mistakes With Crochet Earrings
The motif ruffles instead of lying flat. A flat circle needs steady increases. If Round 2 of the beaded circle has 15 or 17 stitches, you’ve gained or lost one somewhere. Count at the end of every round.
The magic ring opens up. Pull the tail firmly after the first round, then weave the tail in with a few back-and-forth passes before trimming.
Earrings are too heavy. Ears carry the weight of whatever you hang from them. Large beads, glass charms, and thick yarn add up quickly. If a pair tugs on the lobe, switch to thinner thread, smaller beads, or a lighter pattern.
Findings aren’t secure. A jump ring should close fully. Twist the two ends sideways past each other, not outward, so the ring doesn’t spring open. Loop the jump ring through a stitch that’s part of the structure, not a single loose thread.
The thread breaks while stiffening. Thread that’s been pulled tight against a hook for hours can weaken. If a section looks thin or frayed, redo it before stiffening.
Crochet Earrings for Beginners: Where to Start
Start with the hoop. It has no stitch count to track and teaches you to keep an even tension. The flower comes next, since it adds a magic ring and a simple repeat. Save the beaded dangle for third, because loading beads and working them in place is the fiddliest step.
If you’re still building basics, the crochet patterns for beginners page lists easier projects to practise on first, and the crochet accessories roundup has other small makes that use the same skills. Once earrings feel easy, fingerless gloves are a sensible next accessory, and the pattern categories page shows everything else on the site.
Crocheted Earrings to Sell: What to Check First
Crochet earrings to sell need a bit more care than a pair you make for yourself.
Nickel is the biggest issue. Plated findings often contain it, and a skin reaction is a good way to lose a customer. A study of earrings bought in San Francisco found that nearly a third of inexpensive earrings tested positive for nickel, and the researchers found no price point that guaranteed a pair was nickel-free. Findings made from surgical-grade stainless steel, titanium, or solid gold are safer starting points than plated metal.
Consistency matters. If you list a pair as “medium flower earrings,” the next pair should match in size and color. Keep notes on thread brand, color number, hook size, and stiffening method so you can repeat it.
Photograph them on a plain background and show scale next to a coin or a hand. Customers can’t judge size from a close-up of thread.
Package them so they don’t crush. A small card with a slit for the ear wires keeps the shape intact in the post.
If you’d rather buy a finished design than write your own, patterns for small accessories are listed in the MapleHookCrochet Etsy shop.
Thread Crochet Earrings vs Yarn Earrings
Thread crochet earrings look lacy and delicate, and they stiffen cleanly. They also take more patience, because the stitches are tiny and your hook is thin. Yarn earrings work up faster and feel softer, but they won’t hold a precise shape without a lot of stiffener, and they read as casual rather than dressy. If you’ve never crocheted with thread, try a hoop first. The covering stitch is forgiving, and a bit of unevenness disappears under the stiffener.
Care and Storage
Store finished pairs flat or in a small box with dividers. Stiffened earrings can crack if you press them in a crowded jewelry bag, and unstiffened ones can pick up snags from other pieces. If a pair gets damp, lay it flat to dry and reshape by hand. If the stiffener softens or flakes, a fresh light coat usually sets it again.
FAQs
What thread is best for crochet earrings?
Mercerized cotton in size 10 is a common choice, because it keeps its shape and takes stiffener well. Embroidery floss is an alternative if you want brighter color.
How much thread does one pair use?
It depends on the pattern, thread, and hook size. A single ball of crochet thread is far more than a pair needs, so one ball can cover many pairs.
Do I have to stiffen crochet earrings?
Not always. A hoop covered tightly over a metal ring keeps its shape without stiffener. Flat flowers and circles usually look better stiffened.
Can I wash crocheted earrings?
Avoid soaking them. Stiffened pieces can lose their shape when wet, so wipe them clean with a barely damp cloth and let them dry flat.

Leave a Reply