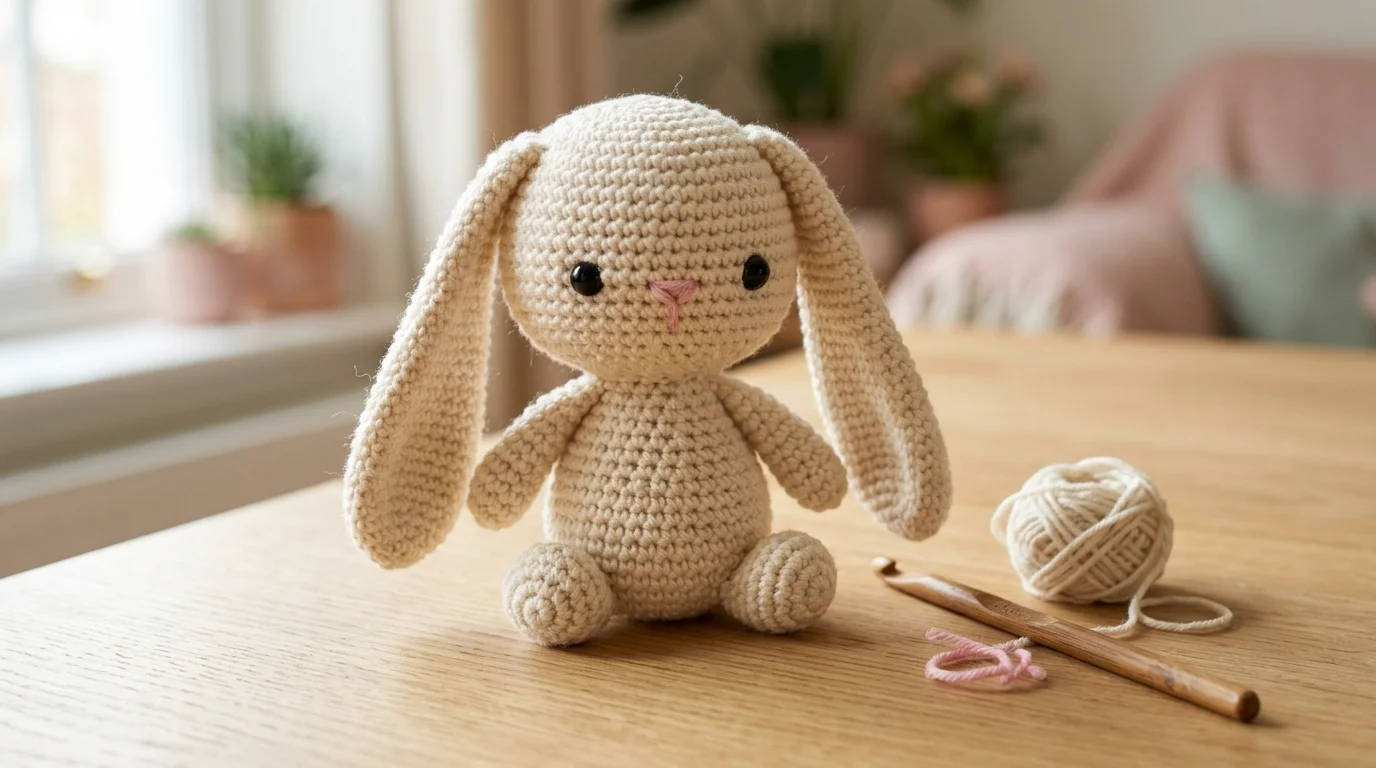
This crochet bunny is a free amigurumi pattern worked in a continuous spiral of single crochet, with increases and decreases doing all the shaping. You’ll make five pieces (a head, a body, two floppy ears, two arms and a tail), sew them together, and embroider a simple face. Worked in worsted yarn with a small hook, it makes a soft Easter gift or a nursery toy.
At a Glance
- Project: sitting amigurumi bunny with floppy ears
- Skill level: confident beginner
- Skills: magic ring, single crochet, increase, decrease (US terms)
- Yarn: worsted weight cotton or acrylic
- Hook: 3.5 mm (E-4)
- Finished size: depends on your yarn and hook
Table of Contents
What Makes a Crochet Bunny for Beginners Easy?
A crochet bunny for beginners should lean on one stitch, and this one does. Every piece is a ball or tube worked in single crochet, so there are no turning chains, no joins and no seams to line up. The two skills beyond the basic stitch are the magic ring and the decrease. If those terms are new, this guide to soft toy crochet patterns explains amigurumi vocabulary, and the single crochet tutorial covers the base stitch.
Amigurumi is the Japanese craft of making small stuffed creatures, and Wikipedia’s amigurumi entry notes that a small hook gives the tight fabric that keeps stuffing from showing. That’s why the hook below is small.
Materials and Tools
- Yarn: worsted weight, which is category 4 on the Craft Yarn Council’s 0 to 7 yarn weight scale, in your main color, plus scraps of pink and white
- Hook: 3.5 mm (E-4)
- Eyes: 6 to 8 mm safety eyes, or black embroidery thread
- Stuffing: polyester fiberfill
- Notions: yarn needle, scissors, stitch marker, pins
Exact yardage hasn’t been measured, so start with one ball of the main color and use scraps for the details.
Before You Begin
This pattern uses US terms, so UK crocheters should read sc as double crochet. Work every piece in a spiral, and mark the first stitch of each round instead of joining.
- R: round
- MR: magic ring
- sc: single crochet
- inc: two sc in one stitch
- dec: single crochet two stitches together
- (1 sc, inc) x 6: repeat the bracketed steps six times
- (12): your stitch count at the end of the round
Check your count after every round. A missed increase is easy to fix on round 4 and miserable to find on round 11.
How Do You Make a Crochet Bunny Step by Step?
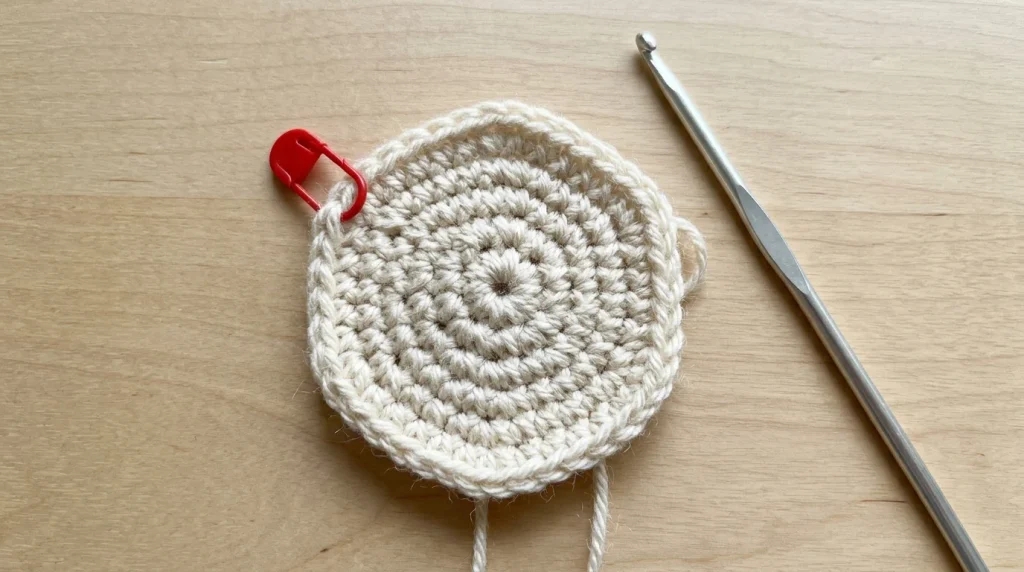
Head
- R1: MR, 6 sc (6)
- R2: Inc in each stitch (12)
- R3: (1 sc, inc) x 6 (18)
- R4: (2 sc, inc) x 6 (24)
- R5: (3 sc, inc) x 6 (30)
- R6-R10: Sc in each stitch (30)
Push the safety eyes between rounds 8 and 9, about six to eight stitches apart, and lock the washers. Pin them first and compare both sides before locking.
- R11: (3 sc, dec) x 6 (24)
- R12: (2 sc, dec) x 6 (18)
Stuff the head firmly now.
- R13: (1 sc, dec) x 6 (12)
- R14: Dec x 6 (6)
Fasten off and close the hole with your needle.
Body
- R1: MR, 6 sc (6)
- R2: Inc in each stitch (12)
- R3: (1 sc, inc) x 6 (18)
- R4: (2 sc, inc) x 6 (24)
- R5-R12: Sc in each stitch (24)
- R13: (2 sc, dec) x 6 (18)
- R14: Sc in each stitch (18)
- R15: (1 sc, dec) x 6 (12)
Stuff firmly, then work round 16.
- R16: Dec x 6 (6)
Fasten off and close the hole.
Floppy Ears (make 2)
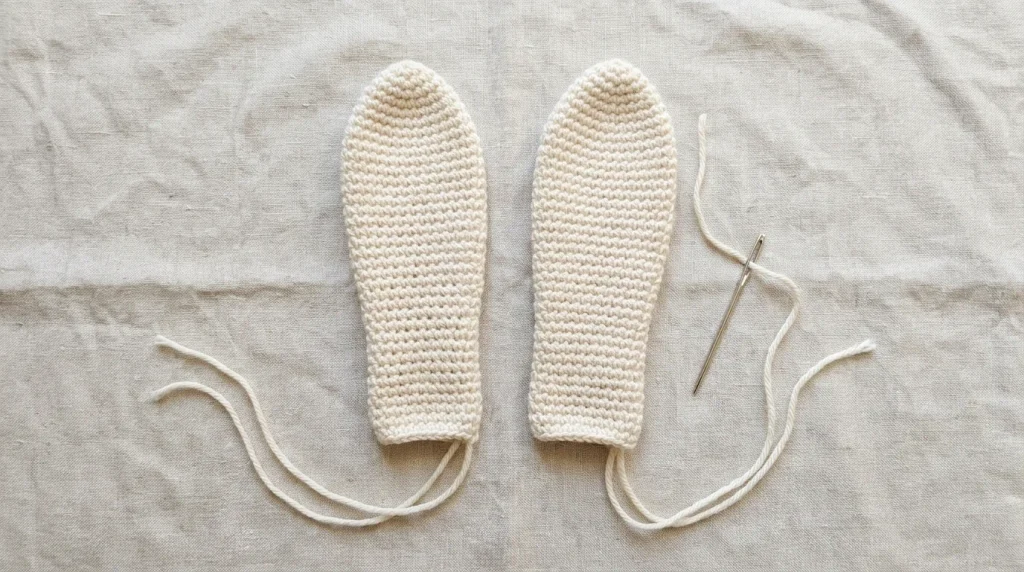
- R1: MR, 6 sc (6)
- R2: Inc in each stitch (12)
- R3: (3 sc, inc) x 3 (15)
- R4-R12: Sc in each stitch (15)
- R13: (3 sc, dec) x 3 (12)
Fasten off with a long tail. Don’t stuff them. The unstuffed tube flattens, and that flat edge is what lets a crochet bunny with floppy ears drape the way it should.
Arms (make 2)
- R1: MR, 6 sc (6)
- R2: (1 sc, inc) x 3 (9)
- R3-R8: Sc in each stitch (9)
Fasten off with a long tail and stuff lightly.
Tail
- R1: MR, 6 sc (6)
- R2: Inc in each stitch (12)
- R3: Sc in each stitch (12)
- R4: Dec x 6 (6)
Stuff, fasten off and leave a long tail.
Assembly and Face
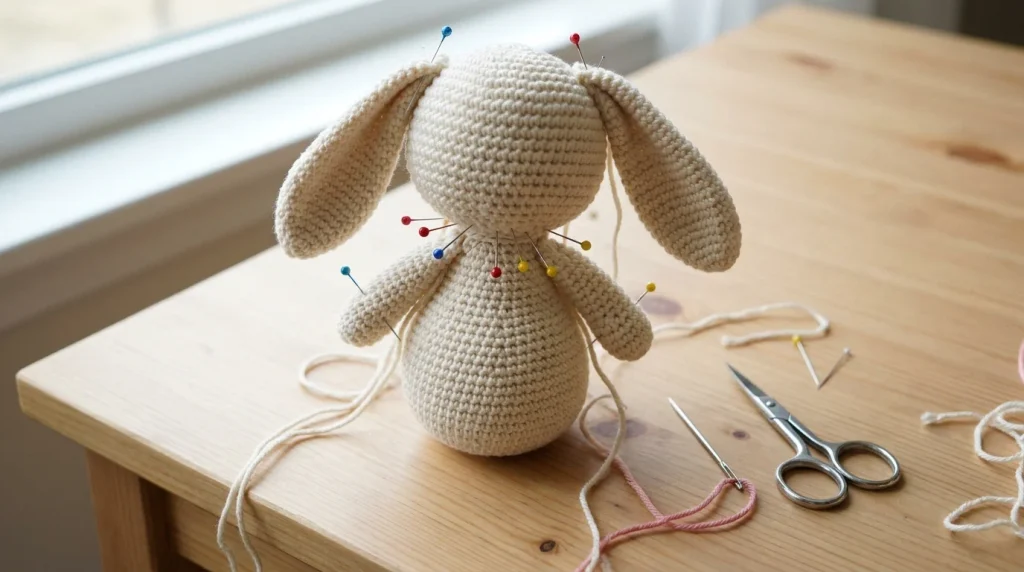
Pin the head over the closed top of the body, leaning it slightly forward, and whip stitch all the way around. Sew the ears to rounds 3 and 4 on either side of the crown, with the flat edges facing front to back. Sew the arms to the body at rounds 12 and 13 and the tail to the back near the base. Embroider a small pink Y-shaped nose on round 10, centered between the eyes.
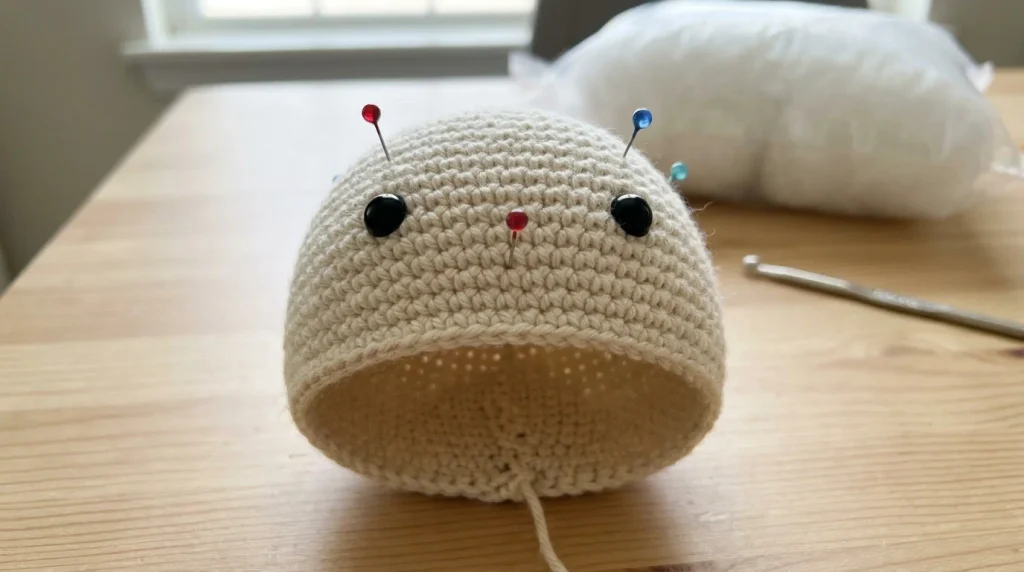
Weave in every yarn tail before you close a piece, because loose ends near the face stand out and can snag small fingers. Pull the sewing yarn snug at each stitch, then run the needle out through the body and trim so the end sinks into the stuffing.
How Much Stuffing Does a Crochet Bunny Need?
Stuff in small tufts, not big handfuls, and push each one into the corners with a closed hook handle. A crochet bunny needs firm filling in the head and body so it holds its shape. If white fiber shows between stitches, you’ve overfilled or your tension is loose. Stuff the head before round 13 and the body before round 16, because the openings get too small afterward. Leave the ears empty and fill the arms lightly.
Which Yarn Gives the Best Amigurumi Bunny?
Any worsted yarn works, but the fiber changes how the finished toy looks and feels.
| Yarn type | Stitch definition | Feel | Best use |
|---|---|---|---|
| Cotton | Crisp, easy to count | Firm, little give | Shelf display, Easter decor |
| Acrylic | Clear and springy | Soft, easy care | Gifts and everyday toys |
| Chenille or velvet | Stitches disappear | Very plush | Cuddly toys, but hard to count |
If stuffing peeks through the stitches, drop a hook size.
Does Gauge Matter for a Crochet Bunny Pattern?
Not in the way it does for a sweater. Nothing has to fit a body, and the stitch counts above stay fixed, so your yarn and hook simply scale the toy up or down. What does matter is density. Amigurumi fabric should feel firm when you squeeze a finished piece, with no gaps. Crochet the first head rounds, stuff them loosely, and look at the stitches. If you can see fiberfill, go down a hook size before you commit to the whole bunny.
Is a Crochet Bunny Safe for Babies?
Not automatically. In the US, the Consumer Product Safety Commission bans toys intended for children under three if small parts create a choking hazard. This pattern hasn’t been tested to any toy standard, so for a baby, embroider the eyes with tight satin stitches, skip beads and buttons, and sew every piece on twice. Check the seams again each time you wash it.
How Do You Change This Crochet Bunny?
- Crochet mini bunny: use fingering or sport weight yarn with a 2.0 to 2.5 mm hook. The stitch counts stay the same, and every piece shrinks.
- Crochet baby bunny lovey: make only the head and ears, then sew them to one corner of a small soft square blanket. More newborn ideas live in this baby crochet roundup.
- Crochet Easter bunny: tie a ribbon around the neck, or stitch a small orange carrot to the arms.
- Color choices: gray, cream and soft brown read as natural rabbit colors, while pastel yarn leans toward spring.
- Longer legs: make two extra arms and sew them to the base as feet.
Common Problems and How to Fix Them
Most trouble with a crochet bunny comes from tension and stuffing, not counting.
Stuffing shows through the stitches. Your fabric is too loose. Go down a hook size, or stuff in smaller pieces.
The head wobbles. It’s under-stuffed. Push more fiberfill into the neck before the final decrease round.
The ears stand up. You stuffed them, or the yarn is too stiff. Leave ears empty and pick a softer yarn.
One eye looks higher. You locked the washers before checking. Pin, step back, then lock.
Visible gaps at decreases. Work every decrease as an invisible decrease: insert the hook through the front loop only of each of the next two stitches, then draw up one loop through both.
The free crochet duck pattern uses the same ball-and-tube construction, and this easy crochet animals collection has more ideas.
FAQs
How big is the finished crochet bunny?
It depends on your gauge. Heavier yarn and a larger hook make a larger bunny, and a thinner yarn makes a smaller one. Measure your own result rather than expecting a fixed number.
Is a crochet rabbit pattern different from a crochet bunny pattern?
Usually not. Bunny tends to describe a rounder, cuter shape, while rabbit patterns often have longer legs and a more realistic body.
Can I wash a finished toy?
Check the yarn label first. Acrylic usually tolerates a gentle wash in a pillowcase, then air drying. Cotton can shrink, so wash it cool.
Do I need safety eyes?
No. Embroidered eyes are the cautious choice for any toy a young child might mouth.
How do I make the ears stand upright?
Stuff them lightly, use a stiffer cotton, and sew them upright on the crown.
Can I use chunky yarn for this crochet bunny tutorial?
Yes. The stitch counts don’t change, so a bulky yarn with a matching hook gives a much larger toy. Pick bigger safety eyes to keep the face in proportion, and expect the pieces to need more stuffing.
Final Thoughts
This free crochet bunny pattern gives you a simple sitting toy from one stitch and five small pieces. Work the head first so you can judge the face before committing to the body. Once it’s done, change the yarn color, try the mini version, or add a ribbon for spring. A second crochet bunny goes faster, because the round counts are already familiar.

Leave a Reply